I purchased this PWP 2011 CR-Z EX 6 speed as my next project car. I have been in the Honda game for awhile with a few builds throughout the years but it has been a little bit now since I began a new one. So here is the beginning of a probably long road ahead.
Drivetrain:
JDM K20A Engine/Tranmission
Exedy Stage 2 clutch
Exedy lightweight flywheel
Hybrid Racing fuel rail
Hybrid Racing Fuel gauge
Hybrid Racing RSX shifter
Hybrid Racing RSX shifter cables
Hybrid Racing tucked fuel line
Hybrid Racing grounding kit
Ktuned clutch slave
Ktuned upper -16AN coolant housing
Ktuned thermostat housing
Hasport engine mounts
Hasport swap axles
Acura ZDX throttle body
Ktuned ZDX throttle body adapter
RBC intake manifold
Vibrant Catch Can
Chase Bays Coolant Overflow
Moroso Street/Strip Baffled Oil Pan
King Motorsports custom 4-2-1 header
King Motorsports custom 3" exhaust with turndown
King Motorsports tune
Suspension/Brakes:
HKS Hipermax IV GT Coilovers
Spoon front sway bar and endlinks
Progress Technology rear sway bar
SPC EZ front camber bolts
Chase Bays BBE Kit
Earls Speed Flex -3AN brake lines to eliminate ABS
Interior:
JDM hazard button
Mugen sport mats
Weathertech all-season mats
Flocked Dash
Black Headliner
Black door panel inserts
Carbon Fiber Vinyl Wrapped Trim
Mugen Racing III steering wheel
Works Bell steering hub (crush type)
Defi DSDF digital display
Exterior:
HPD rear diffuser
JDP Rear Spoiler
Verus Engineering Hood Vents
Lamin-x fog light vinyl in yellow
Wheels/Tires:
Mugen M12 (17x7 +52)
Bridgestone Potenza RE-71R (215/45/17)
Muteki Super Tuner open-ended lug nuts
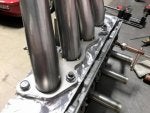
When I first brought it home a few months ago
![]()
First low price mod was a JDM hazard button from Kamispeed
![]()
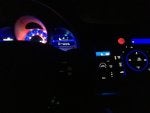
The next addition to the garage to help in the process, which is something I've always wanted at home
![]()
I will follow up in the near future with some progress on this build as a few more things have happened but I haven't taken the time to document.
Drivetrain:
JDM K20A Engine/Tranmission
Exedy Stage 2 clutch
Exedy lightweight flywheel
Hybrid Racing fuel rail
Hybrid Racing Fuel gauge
Hybrid Racing RSX shifter
Hybrid Racing RSX shifter cables
Hybrid Racing tucked fuel line
Hybrid Racing grounding kit
Ktuned clutch slave
Ktuned upper -16AN coolant housing
Ktuned thermostat housing
Hasport engine mounts
Hasport swap axles
Acura ZDX throttle body
Ktuned ZDX throttle body adapter
RBC intake manifold
Vibrant Catch Can
Chase Bays Coolant Overflow
Moroso Street/Strip Baffled Oil Pan
King Motorsports custom 4-2-1 header
King Motorsports custom 3" exhaust with turndown
King Motorsports tune
Suspension/Brakes:
HKS Hipermax IV GT Coilovers
Spoon front sway bar and endlinks
Progress Technology rear sway bar
SPC EZ front camber bolts
Chase Bays BBE Kit
Earls Speed Flex -3AN brake lines to eliminate ABS
Interior:
JDM hazard button
Mugen sport mats
Weathertech all-season mats
Flocked Dash
Black Headliner
Black door panel inserts
Carbon Fiber Vinyl Wrapped Trim
Mugen Racing III steering wheel
Works Bell steering hub (crush type)
Defi DSDF digital display
Exterior:
HPD rear diffuser
JDP Rear Spoiler
Verus Engineering Hood Vents
Lamin-x fog light vinyl in yellow
Wheels/Tires:
Mugen M12 (17x7 +52)
Bridgestone Potenza RE-71R (215/45/17)
Muteki Super Tuner open-ended lug nuts
When I first brought it home a few months ago

First low price mod was a JDM hazard button from Kamispeed
The next addition to the garage to help in the process, which is something I've always wanted at home

I will follow up in the near future with some progress on this build as a few more things have happened but I haven't taken the time to document.


")