I've been researching short shifters for a while and considered buying the Skunk 2 kit (either already modified by Basis Sport Tuning, or modifying one myself). There have been others on the forum saying "I'll have my own short shifter kit SOON" but still our only option is the Skunk 2. Personally, I'm not going to get all "butt-hurt" over Skunk 2"boycotting" the CR-Z. I could give a Shift. (Get it?) :rotfl:
I just wanted something that works well mechanically. I also love reverse-engineering things and figuring out solutions for myself. I pulled the trigger and ordered a different kit than everyone else. It is a Short Shift Adapter Kit (very similar to the Skunk 2 kit) from a website called "H-Fit".
H-Fit.com....Performance Products for your Honda FIT GD3 GE8
The difference in OEM shifter shaft diameter between the Fit and Cr-Z is why Basis Sport Tuning had to "modify" a Skunk 2 kit to fit our cars. This modification was not my idea. Kudos to Tony at Basis Sport Tuning.
Given my line of work and expertise in metal fabrication, I was pretty sure that with the right-sized drill bit and a Dremel Tool, I could clamp the shifter adapter in my vise and progressively ream the hole out a fraction of an inch bigger for a perfect fit. I was right.
The Short Shift Adapter Kit has an M.S.R.P. of $95.00, but that includes their own shifter base "Hard Mount" bushings. They add the bushings as a bonus and sell the kit for only $75.00 - I paid $81.00 with shipping (USPS Priority Mail w/Tracking). The kit even comes with RED Loctite thread locker. The adapter mounts on the end of the OEM shifter "stick" and extends the length 18mm downwards.
![Image]()
If you remember your physics lessons, you know that a longer lever underneath a pivot point will push / pull FARTHER when a lever (of an un-changed length) above the pivot point is moved. It's a simple matter of leverage...
THIS KIT IS DESIGNED FOR A 2009+ GE-8 HONDA FIT. I HAD TO MODIFY THIS KIT TO WORK ON A CR-Z. MODIFY YOUR OWN CAR AT YOUR OWN RISK.
Step 1) Remove dash trim and entire center console. Yes, it IS necessary, because you need all the room to work you can get. Here's the instructions: http://www.collegehillshonda.com/instructions/crz/2011/armrestconsole.pdf
My son "Goose" took the liberty of "******* Dynamatting" all the exposed metal floor / frame areas that are covered by the center console. The more areas we do, the quieter this little car gets. :thumbsup:
Step 2) Remove the 4 (four) 12mm bolts holding the shifter box assembly to the vehicle's floor.
![Image]()
Step 3) Disconnect the Auto Stop / Shifter Interlock cable from it's lever in the left side if the shifter mechanism. DO NOT LOSE THE TINY COTTER PIN!
![Image]()
Step 4) Disconnect the Auto Stop / Shifter Interlock cable housing from the shifter base assembly by turning the large black plastic mounting "grommet" 1/2 a turn counter-clockwise (viewed as seated in the driver's seat position), and sliding it upwards like so:
![Image]()
Step 5) Slide a Flat (Common) Screwdriver underneath the spring slip that secures the shift linkage rod to the shifter base assembly.
![Image]()
The clip will slide upwards and pop out.
![Image]()
Step 6) Remove the entire shifter base assembly from the car. Remove the four metal sleeves from the four sloppy-feeling OEM rubber mount bushings, and then remove the rubber mount bushings themselves. These will not be re-used (but don't throw them away).
![Image]()
Step 7) Clamp the entire shifter base assembly in a vise. It is made of injection-molded "Duracon" or "Delrin" (hard plastic) so don't over-tighten it. Using a dremel tool and a small grinder bit, CAREFULLY enlarge the 4 mounting holes in a slow, steady, even and concentric fashion. The Dremel tool eats the Delrin-up really easily, so go slow and be careful. The idea here is to enlarge them just enough so the smaller diameter portion of the hard-mount bushings "snap" in (with a close-tolerance or "interference" fit). I used super glue to temporarily hold them in place so they wouldn't fall out during final re-assembly.
![Image]()
The inside bore of the adapter is about 1mm (.020") too small in diameter. This is the piece you must "Modify" to make it slip over the CR-Z's shifter shaft (which is about 1mm larger than a Honda Fit's).
![Image]()
Step 8) Using a Dremel tool and a small-diameter carbide bit, slowly and carefully remove a small amount of metal from the inside bore of the stainless steel short-shift adapter. REMOVE THE 4 SMALL SET SCREWS BEFORE GRINDING THE ADAPTER! I only removed about .010" (ten thousandths of an inch) or so of material. Keep checking the fit of the piece periodically to ensure you don't enlarge the bore too much. It should fit snugly.
![Image]()
Step 9) I used a 5/16" drill bit to drill the inside bore of the adapter about 1/8" deeper. This will ensure the adapter slides onto the OEM shifter shaft 1/8" farther than originally designed; so the four set screws will "bite" against the solid / cylindrical part of the OEM shifter shaft, and not on the machined / tapered part where they would be more apt to come loose.
![Image]()
Step 10) Loosly install the 4 set screws into the adapter with one drop of the Red Loctite on each screw. Install the adapter on the shifter shaft and give it a tap with a hammer for good measure. Tighten all 4 set screws to 10Nm torque (or just tighten all 4, then go back and snug them all down again).
I wanted to give the entire assembly a "dry-run" so I temporarily installed it back in the car and ran through the gears. There was a slight downward bend to the shifter linkage rod, so I chose to add 1 (one) 1/4" thick aluminum plate "spacer" (with a 1/4" diameter hole drilled in each one) in-between the four hard-mount bushings and the car's frame / floor.
*NOTE*
The OEM rubber mount bushings and their metal sleeves sat about 1/4" below the plastic shifter base assembly. When replaced; the new "hard-mount" bushings sit 1/2" below the shifter base. Adding an additional 1/4" spacer (like I did) only raises the entire shifter base assembly a total of 1/4" above the OEM setup. The Skunk 2 kit raises it about 1/2"-3/4". Just food for thought.
![Image]()
The addition of these 1/4" thick spacers straightened the path of the shift linkage rod so it matched the OEM setup. It shifted very smoothly, so I took it around the block for a test drive before re-installed everything in reverse order of the disassembly.
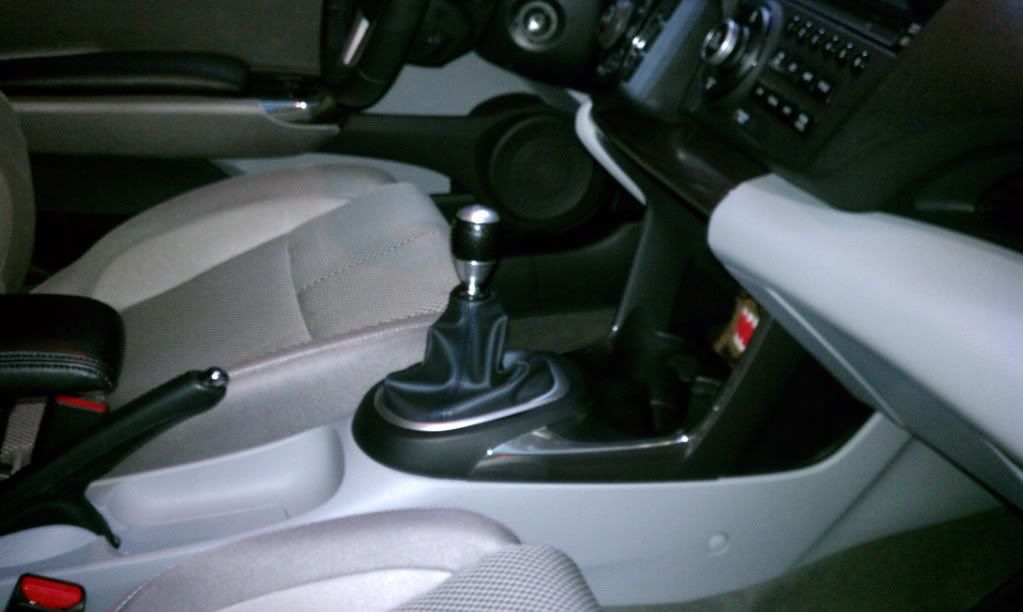
The shift knob feels as though it is about 1/4" higher than stock. That's not much. I didn't think I'd like it, but it actually feels perfect now when shifting with my elbow resting on the OEM center armrest console.
IMO, the shifter throw is about 30%-35% shorter. Shifting is crisp, precise and purposeful. Even casual shifting is quicker and more precise now. There is a definite difference with hard mount bushings. It feels very "engaged" and mechanical, but is easy to shift. I did not measure the stock shifter throw, but I remember it to be a little over 4". The shifter throw from 1st to 2nd gear is now 3-1/8"!!! :thumbsup:
The shifter feels closer to my '05 STI or even an S2000 (the OEM AP-1 S2000 knob I have is about 1/2 a pound).
![Image]()
I hope it helps some of you out. I know the difficulty level of this DIY might be a little much for some, but if you were planning on installing your own Skunk 2 kit, remember: I DID THIS IN MY GARAGE WITH COMMON HAND TOOLS, A VISE AND A DRILL! The only thing different than installing the Skunk 2 kit is reaming the adapter yourself and buying spacers. The hard-mount kit really make this kit a DIY bargain IMO!
![Image]()
Now if you'll excuse me; I'm going out for a drive! :vtec:
--Rob
I just wanted something that works well mechanically. I also love reverse-engineering things and figuring out solutions for myself. I pulled the trigger and ordered a different kit than everyone else. It is a Short Shift Adapter Kit (very similar to the Skunk 2 kit) from a website called "H-Fit".
H-Fit.com....Performance Products for your Honda FIT GD3 GE8
The difference in OEM shifter shaft diameter between the Fit and Cr-Z is why Basis Sport Tuning had to "modify" a Skunk 2 kit to fit our cars. This modification was not my idea. Kudos to Tony at Basis Sport Tuning.
Given my line of work and expertise in metal fabrication, I was pretty sure that with the right-sized drill bit and a Dremel Tool, I could clamp the shifter adapter in my vise and progressively ream the hole out a fraction of an inch bigger for a perfect fit. I was right.
The Short Shift Adapter Kit has an M.S.R.P. of $95.00, but that includes their own shifter base "Hard Mount" bushings. They add the bushings as a bonus and sell the kit for only $75.00 - I paid $81.00 with shipping (USPS Priority Mail w/Tracking). The kit even comes with RED Loctite thread locker. The adapter mounts on the end of the OEM shifter "stick" and extends the length 18mm downwards.

If you remember your physics lessons, you know that a longer lever underneath a pivot point will push / pull FARTHER when a lever (of an un-changed length) above the pivot point is moved. It's a simple matter of leverage...
THIS KIT IS DESIGNED FOR A 2009+ GE-8 HONDA FIT. I HAD TO MODIFY THIS KIT TO WORK ON A CR-Z. MODIFY YOUR OWN CAR AT YOUR OWN RISK.
Step 1) Remove dash trim and entire center console. Yes, it IS necessary, because you need all the room to work you can get. Here's the instructions: http://www.collegehillshonda.com/instructions/crz/2011/armrestconsole.pdf
My son "Goose" took the liberty of "******* Dynamatting" all the exposed metal floor / frame areas that are covered by the center console. The more areas we do, the quieter this little car gets. :thumbsup:
Step 2) Remove the 4 (four) 12mm bolts holding the shifter box assembly to the vehicle's floor.

Step 3) Disconnect the Auto Stop / Shifter Interlock cable from it's lever in the left side if the shifter mechanism. DO NOT LOSE THE TINY COTTER PIN!

Step 4) Disconnect the Auto Stop / Shifter Interlock cable housing from the shifter base assembly by turning the large black plastic mounting "grommet" 1/2 a turn counter-clockwise (viewed as seated in the driver's seat position), and sliding it upwards like so:

Step 5) Slide a Flat (Common) Screwdriver underneath the spring slip that secures the shift linkage rod to the shifter base assembly.

The clip will slide upwards and pop out.

Step 6) Remove the entire shifter base assembly from the car. Remove the four metal sleeves from the four sloppy-feeling OEM rubber mount bushings, and then remove the rubber mount bushings themselves. These will not be re-used (but don't throw them away).

Step 7) Clamp the entire shifter base assembly in a vise. It is made of injection-molded "Duracon" or "Delrin" (hard plastic) so don't over-tighten it. Using a dremel tool and a small grinder bit, CAREFULLY enlarge the 4 mounting holes in a slow, steady, even and concentric fashion. The Dremel tool eats the Delrin-up really easily, so go slow and be careful. The idea here is to enlarge them just enough so the smaller diameter portion of the hard-mount bushings "snap" in (with a close-tolerance or "interference" fit). I used super glue to temporarily hold them in place so they wouldn't fall out during final re-assembly.

The inside bore of the adapter is about 1mm (.020") too small in diameter. This is the piece you must "Modify" to make it slip over the CR-Z's shifter shaft (which is about 1mm larger than a Honda Fit's).

Step 8) Using a Dremel tool and a small-diameter carbide bit, slowly and carefully remove a small amount of metal from the inside bore of the stainless steel short-shift adapter. REMOVE THE 4 SMALL SET SCREWS BEFORE GRINDING THE ADAPTER! I only removed about .010" (ten thousandths of an inch) or so of material. Keep checking the fit of the piece periodically to ensure you don't enlarge the bore too much. It should fit snugly.

Step 9) I used a 5/16" drill bit to drill the inside bore of the adapter about 1/8" deeper. This will ensure the adapter slides onto the OEM shifter shaft 1/8" farther than originally designed; so the four set screws will "bite" against the solid / cylindrical part of the OEM shifter shaft, and not on the machined / tapered part where they would be more apt to come loose.

Step 10) Loosly install the 4 set screws into the adapter with one drop of the Red Loctite on each screw. Install the adapter on the shifter shaft and give it a tap with a hammer for good measure. Tighten all 4 set screws to 10Nm torque (or just tighten all 4, then go back and snug them all down again).
I wanted to give the entire assembly a "dry-run" so I temporarily installed it back in the car and ran through the gears. There was a slight downward bend to the shifter linkage rod, so I chose to add 1 (one) 1/4" thick aluminum plate "spacer" (with a 1/4" diameter hole drilled in each one) in-between the four hard-mount bushings and the car's frame / floor.
*NOTE*
The OEM rubber mount bushings and their metal sleeves sat about 1/4" below the plastic shifter base assembly. When replaced; the new "hard-mount" bushings sit 1/2" below the shifter base. Adding an additional 1/4" spacer (like I did) only raises the entire shifter base assembly a total of 1/4" above the OEM setup. The Skunk 2 kit raises it about 1/2"-3/4". Just food for thought.

The addition of these 1/4" thick spacers straightened the path of the shift linkage rod so it matched the OEM setup. It shifted very smoothly, so I took it around the block for a test drive before re-installed everything in reverse order of the disassembly.
The shift knob feels as though it is about 1/4" higher than stock. That's not much. I didn't think I'd like it, but it actually feels perfect now when shifting with my elbow resting on the OEM center armrest console.
IMO, the shifter throw is about 30%-35% shorter. Shifting is crisp, precise and purposeful. Even casual shifting is quicker and more precise now. There is a definite difference with hard mount bushings. It feels very "engaged" and mechanical, but is easy to shift. I did not measure the stock shifter throw, but I remember it to be a little over 4". The shifter throw from 1st to 2nd gear is now 3-1/8"!!! :thumbsup:
The shifter feels closer to my '05 STI or even an S2000 (the OEM AP-1 S2000 knob I have is about 1/2 a pound).

I hope it helps some of you out. I know the difficulty level of this DIY might be a little much for some, but if you were planning on installing your own Skunk 2 kit, remember: I DID THIS IN MY GARAGE WITH COMMON HAND TOOLS, A VISE AND A DRILL! The only thing different than installing the Skunk 2 kit is reaming the adapter yourself and buying spacers. The hard-mount kit really make this kit a DIY bargain IMO!
Now if you'll excuse me; I'm going out for a drive! :vtec:
--Rob